Introduction
In this lecture, we will discuss Jenkin, a free and open source automation server which helps automate the parts of software development related to building, testing, and deploying, facilitating continuous integration and continuous delivery. It is free and entirely written in Java. This product is a widely used application around the world that has around 300k installations and growing day by day. Finally, it is a server-based application and requires a web server like Apache Tomcat.

CI / CD with Jenkins
Check my previous article “DevOps Basics” for more details on CI / CD
You can use Jenkins for all your CI / CD tasks to Build and Deliver the Sofware Product !

- Code is built and test as soon as Developer commits code. Jenkins will build and test code many times during the day.
- On Successful build, Jenkins will deploy the source into the test server and notifies the deployment team.
- On Build Failures, Jenkins will notify the errors to the developer team.
- Code is built immediately after any of the Developer commits.
- Automated build and test process saving timing and reducing defects.
Jenkins Architecture
Jenkins uses a master / slave architecture to manage distributed builds. Your primary Jenkins server is the master. In a nutshell, the role of the master is to manage the scheduling of build tasks, to distribute the builds to the slaves for their actual execution, to monitor the slaves (possibly taking them offline if necessary) and finally to save and present build results. Even in a distributed architecture, a master Jenkins instance can also run build jobs directly.

The role of slaves is to do as they are told, which includes performing build jobs sent by the master. You can configure a project to always run on a particular slave, on a particular type of machine, or just let Jenkins select the next available slave.
A slave is a small Java executable that runs on a remote machine and listens for requests from the Jenkins master instance.
Install Jenkins
There are many way to install Jenkins (windows, linux, docker image etc.)
In this article we will see how to install Jenkins on an Ubuntu Virtual Server.
First, you need to install Java 8 on your Linux server :
$ sudo add-apt-repository ppa:webupd8team/java
$ sudo apt-get update
$ sudo apt install openjdk-8-jdk

# To check Java version
$ java - -version
Then, install Jenkins running the following commands :
# Add Key on Host
$ wget -q -O - https://pkg.jenkins.io/debian/jenkins.io.key | sudo apt-key add -

# Add following entry in your /etc/apt/sources.list
$ echo deb http://pkg.jenkins-ci.org/debian binary/ \
       > /etc/apt/sources.list.d/jenkins.list

# Update your local package index, then finally install Jenkins
$ sudo apt-get update sudo apt-get install jenkins

# Check if Jenkins is started
$ systemctl status jenkins
Jenkins default port is 8080, so you can now access to your Jenkins at URL : https://YOU_VIRTUAL_SERVER_IP:8080. The following screen is displayed :

As described on the screen, enter the initial admin password and click on continue.
Then choose the default plugins menu :

Finally create your first admin account, configure your Jenkins URL if needed and it’s done, you can now use Jenkins !
Create Jenkins First Job
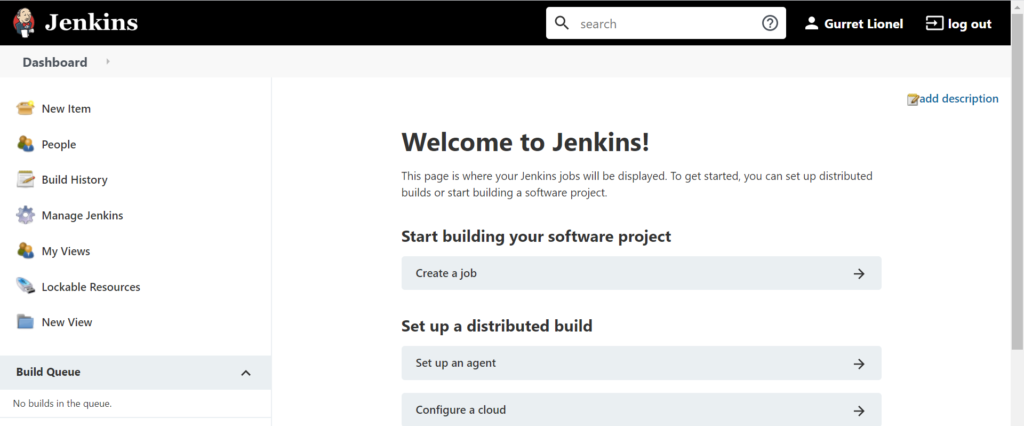
From the initial dashboard, click on create a job.
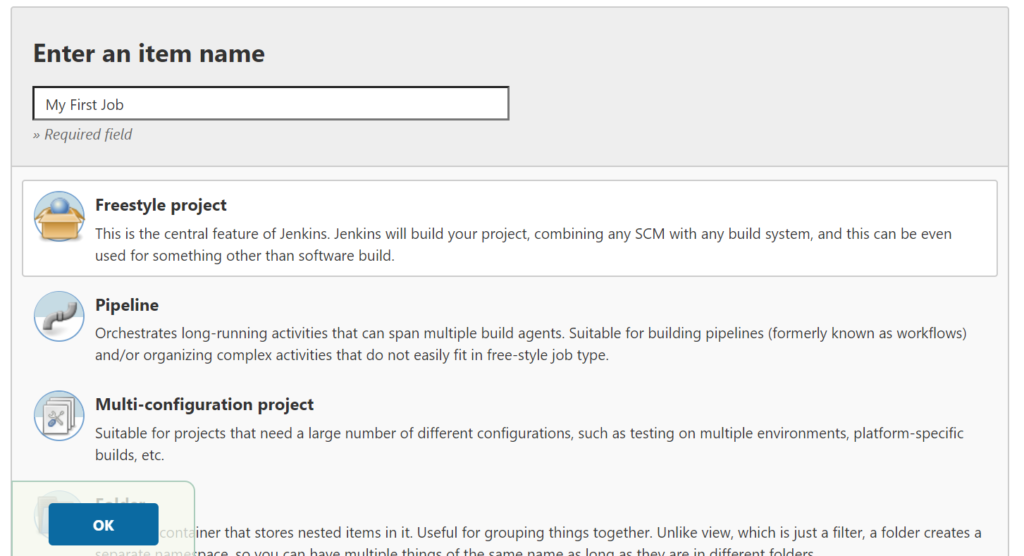
As you can see there are several types of Jobs, we will choose Freestyle project :
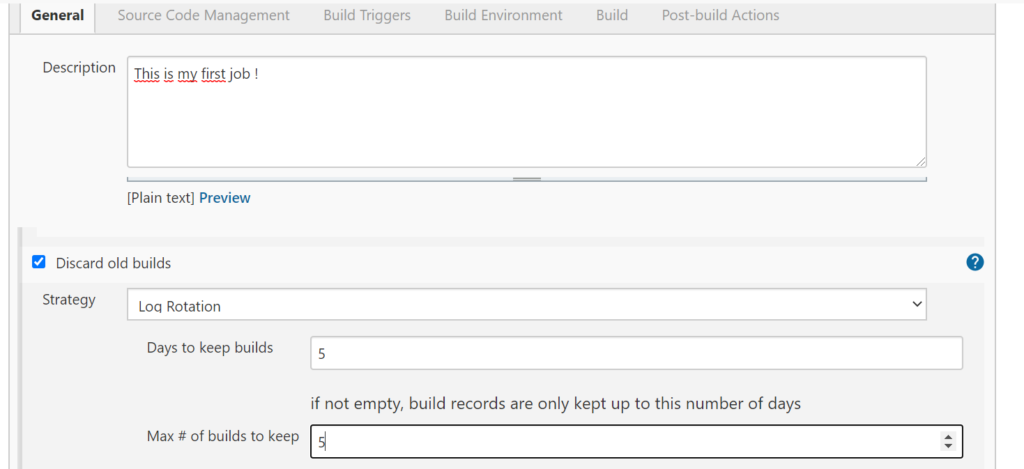
Add a description and some Log rotation as so :
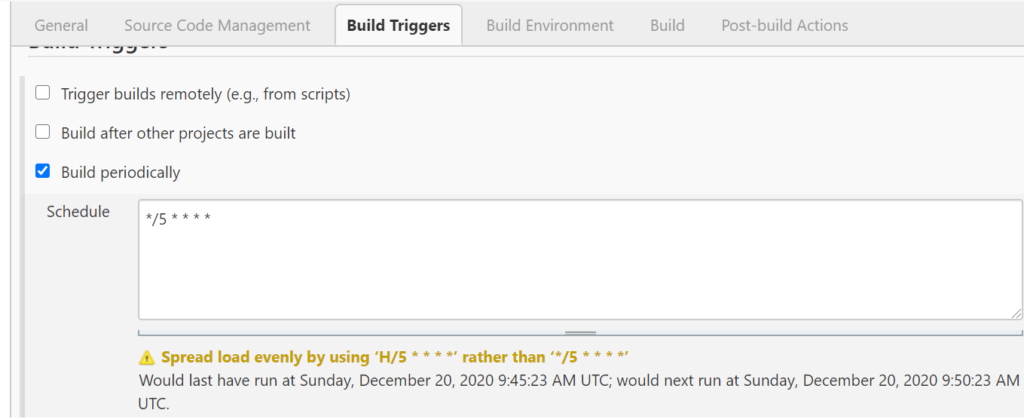
As you can see on the top menu, you can add a Source Code Management like Git to link your SCM to the job. Moreover, there is a Build Trigger menu which helps you to let know Jenkins when it has to run your job (cron, after another job, from scripts etc.)
In this example we will run our Job every 5 minutes :
Then, please check the following options (to delete workspace before starting and add timestamps) :

Finally, we will add a shell script in the build menu as so an click on Save :
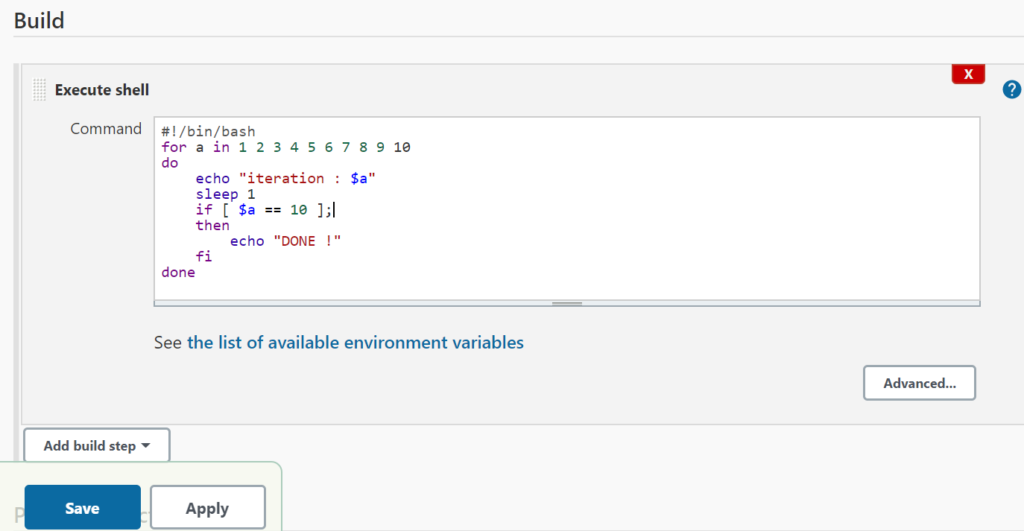
I can wait 5 minutes or run manually my job by clicking on “Build now”.
Here is the console Output of your first job !
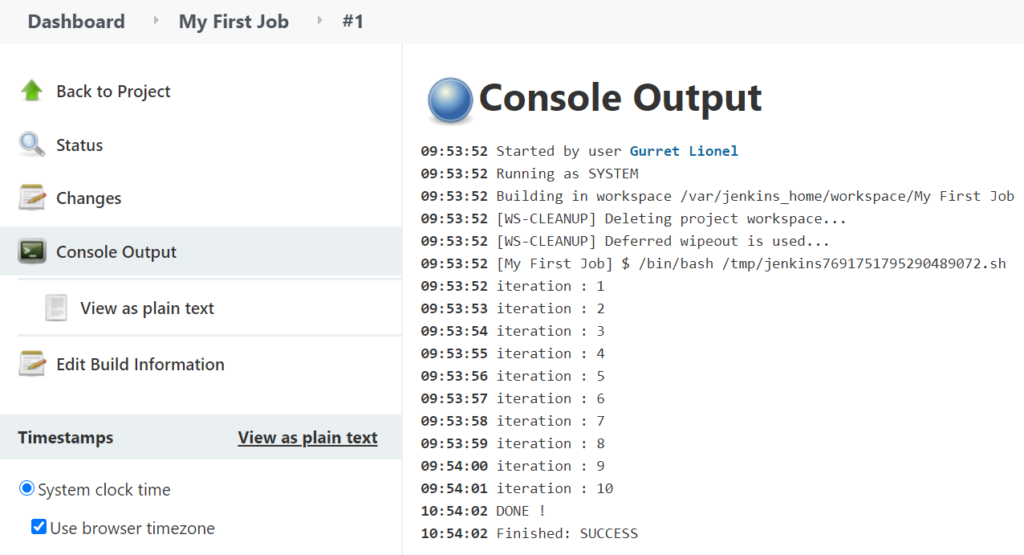
You can configure a lot of different jobs. It can be a job to compile code, to run a bash command, to create a Docker Image and push it to a registry or even to deploy your application on Kubernetes !
Jenkinsfiles and DSL
One last important thing I wanted to share with you was DSL and Jenkinsfiles.
Jenkins Pipeline is a suite of plugins that supports implementing and integrating continuous delivery pipelines into Jenkins. Pipeline provides an extensible set of tools for modeling simple-to-complex delivery pipelines “as code” via the Pipeline DSL.
Jenkins DSL (Domain Specific Language) is a Programatic way to Implement Jenkins Jobs in Groovy. It is used to define Jobs and pipelines in Programatic Form in a file called Jenkinsfile.
Creating a Jenkinsfile, which is checked into source control, provides a number of immediate benefits:
- Code review/iteration on the Pipeline
- Version control
- Peer review
- Rollback and Backups
- Audit trail for the Pipeline
- Single source of truth for the Pipeline, which can be viewed and edited by multiple members of the project.
Here is an example of a Jenkinsfile you can use to create a very easy pipeline :
pipeline {
    agent any

    stages {
        stage('Build') {
            steps {
                echo 'Building..'
            }
        }
        stage('Test') {
            steps {
                echo 'Testing..'
            }
        }
        stage('Deploy') {
            steps {
                echo 'Deploying....'
            }
        }
    }
}
That’s all for today !
Sources
wikipedia
jenkins.io

