What is Infrastructure as Code ?
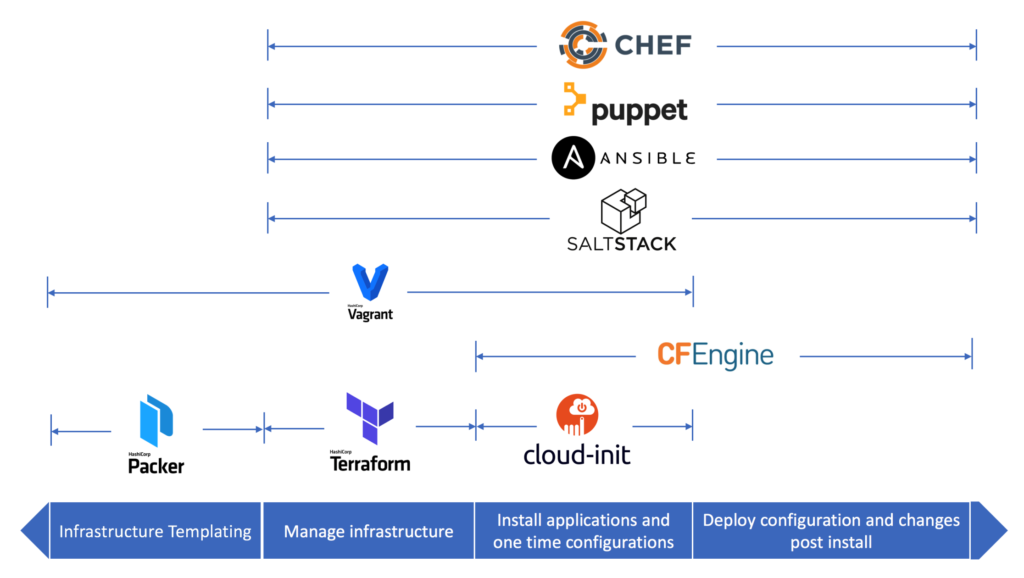
As discussed several times in my articles, we all know that we are in an automation era. In order to deploy automatically infrastructure several tools are being used, and each one can be used for different purposes :

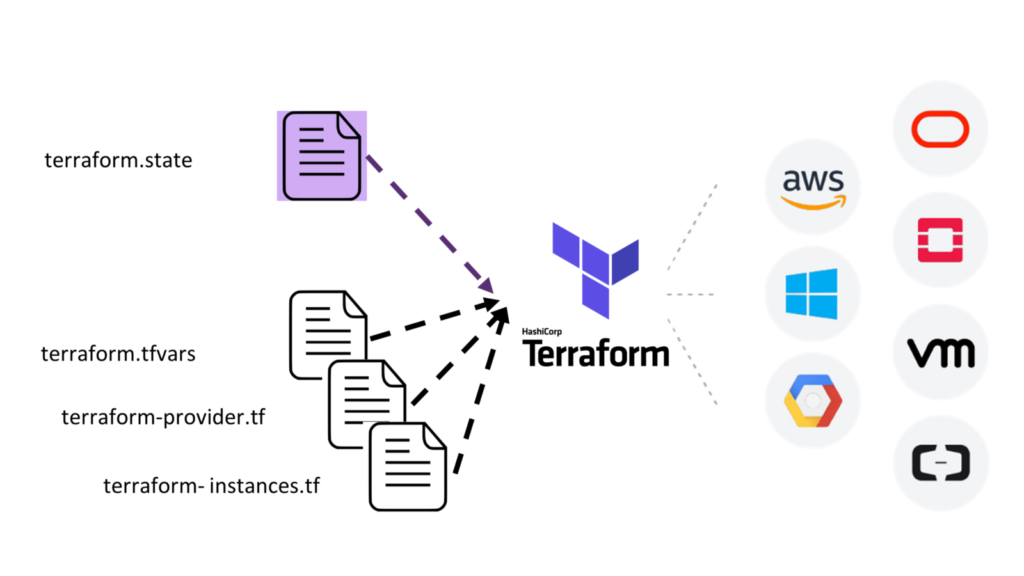
Today we will see Terraform, a tool for building, changing, and versioning infrastructure safely and efficiently. Terraform can manage existing and popular service providers as well as custom in-house solutions (i.e VMWare.)
Configuration files describe to Terraform the components needed to run a single application or your entire datacenter. Terraform generates an execution plan describing what it will do to reach the desired state, and then executes it to build the described infrastructure. As the configuration changes, Terraform is able to determine what changed and create incremental execution plans which can be applied.
The infrastructure Terraform can manage includes low-level components such as compute instances, storage, and networking, as well as high-level components such as DNS entries, SaaS features, etc.
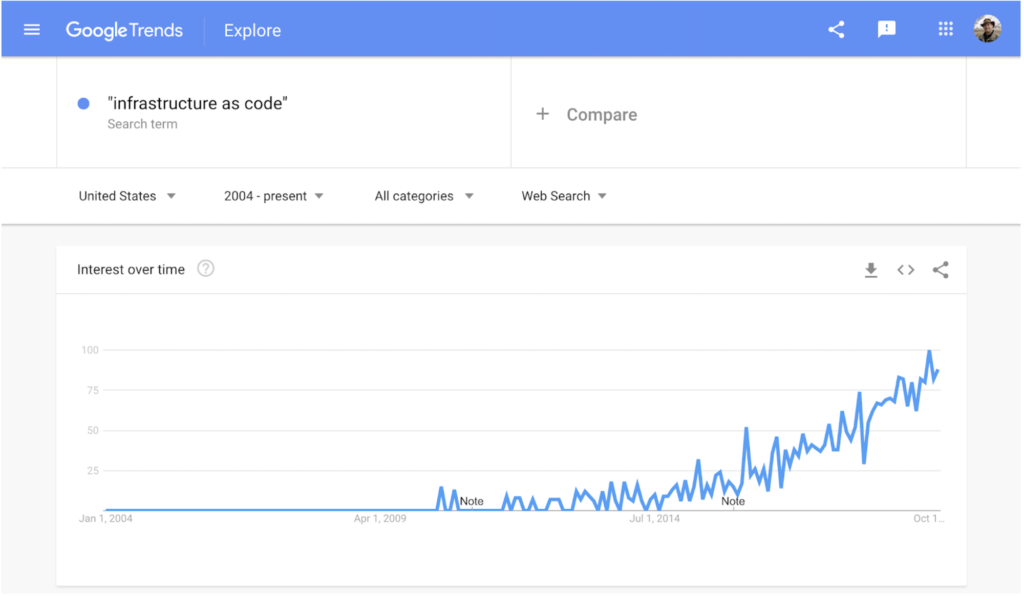
As you can see on the following graph, Terraform is now very popular :

How to install Terraform on Linux ?
First, download the package on the following website : Here
Then, move the binary in /usr/local/bin and be sure that the file is executable. And that’s all !
You can check that everything works by running the following command :
terraform -help
Usage: terraform [-version] [-help] <command> [args]

The available commands for execution are listed below.
The most common, useful commands are shown first, followed by
less common or more advanced commands. If you're just getting
started with Terraform, stick with the common commands. For the
other commands, please read the help and docs before usage.
Let’s deploy resources !
In this example we will deploy an EC2 instance on AWS. So as prerequisites, you will need a free AWS account and an Acces Key and the password linked to it.
Then, you can know create your first terraform file :
touch ec2.tf
We need in a first time, to connect to AWS using a provider :
provider "aws" {
  region     = "us-east-1"
  access_key = "YOUR AWS ACCESS KEY"
  secret_key = "YOUR AWS SECRET KEY"
}
As you may know, AWS doesn’t delete EBS volumes directly when you terminate an EC2 instance. So you can add the following configuration in your resource to be sure that it will be deleted when we will run “terraform destroy” :
resource "aws_instance" "myec2" {
  ami           = "ami-0083662ba17882949"
  instance_type = "t2.micro"
  key_name      = "devops-lionel"
  tags = {
    Name = "ec2-lionel"
  }
  root_block_device {
    delete_on_termination = true
  }
}
We have now our final file with the provider and the resource.
The first command you have to run in order to initialize Terraform and download everything needed is the following :
terraform init
Then you can test and see what will happen by running :
terraform plan
Finally, just run the following to apply your configuration :
terraform apply
To destroy everything (EBS volume included) run :
terraform destroy
We could have done the exact same thing with other public providers. As you may have noticed, a terraform.state file has been generated in your directory. This file is used by Terraform to store state about your managed infrastructure and configuration. This state is used by Terraform to map real world resources to your configuration, keep track of metadata, and to improve performance for large infrastructures.

That’s it for now, in next article, we will discuss about variables, modules, remote state and much more !
Sources
terraform.io
medium.com

